You set the thermostat to 70. The display agrees. But you’re wearing a sweater, there’s a cold spot by the couch, and your partner swears the bedroom is a different climate. Or the furnace cycles on and off every few minutes, or runs forever without hitting the number.
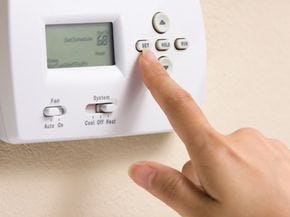
It’s tempting to blame the thermostat and buy a new one. Sometimes that’s right. But a surprising amount of the time the thermostat is fine and something around it is lying to it. Here’s the order I’d check, cheapest and easiest first.
Thanks for reading Homeowner Help! Subscribe for free to receive new posts and support my work.
Step 1: Replace the batteries (2 minutes)
If your thermostat has a display and takes batteries (usually AA or AAA, inside a small compartment on the front or back), weak batteries cause strange behavior: a blank or dim screen, the system not responding, or temperatures that seem off. Many people don’t realize their thermostat has batteries at all.
Swap in fresh ones and see if behavior changes. Do this once a year, and you’ll avoid a surprising number of no-heat calls. (Some thermostats are wired to your system’s power instead. If there’s no battery door, skip this.)
Step 2: Look at where the thermostat is mounted
A thermostat measures the temperature of the air right around it, and nothing else. If its location is unrepresentative, it’ll make decisions for the whole house based on one weird spot. Check for:
- Direct sunlight from a nearby window, which makes it think the house is warmer than it is, so the heat shuts off early
- A heat source nearby: a lamp, TV, or a kitchen wall that gets warm when you cook
- A draft from a nearby door, window, or an air vent blowing directly on it
- An exterior wall that’s colder than the rest of the house
- Dead air: a spot behind a door or in a hallway nook that doesn’t get air movement
Moving a thermostat requires wiring work, which is a job for an HVAC pro, but you can often fix the problem by removing the thing influencing it: move the lamp, close the curtain, or block the draft.
Step 3: Clean the inside (5 minutes)
Dust and tiny insects can build up inside a thermostat and interfere with its sensor or its contacts, especially in older models.
- Turn off power to the HVAC system at the breaker or the furnace’s service switch, because you’ll be touching wiring-adjacent parts.
- Pull the cover straight off. Most snap on, and some thermostats have a visible release tab.
- Gently clean the inside with a can of compressed air or a soft, dry brush. Don’t touch the wires or use liquids.
- Replace the cover, restore power, and wait a few minutes.
If your thermostat has a small mercury-filled glass tube (older round Honeywell-style dials do), don’t throw it in the trash when you replace it. Mercury is hazardous, and your local hazardous waste program can take it.
Step 4: Check if it’s level (older mechanical thermostats only)
Older dial-style thermostats with a mercury switch or a coiled strip rely on being level to read correctly. If yours has a small level mark, or looks tilted on the wall, a level and a quick adjustment can fix readings that are off by a few degrees. Digital thermostats don’t need this.
Step 5: Compare it with a second thermometer
Here’s a simple test that tells you whether the thermostat is actually wrong:
- Buy an inexpensive digital thermometer (about $10), or use one you already have.
- Tape or place it right next to the thermostat, about 5 feet off the floor, and leave it for 15 to 20 minutes with nothing nearby changing.
- Compare the readings.
If they’re within about 1 to 2 degrees, the thermostat is reading fine, and the problem is elsewhere (see below). If the thermostat is off by 3 or more, it’s likely miscalibrated or failing. Many digital thermostats have a temperature offset setting in the menu that lets you correct it by a few degrees, so check the manual before replacing it.
Step 6: If the thermostat is fine, look at the house
If the reading matches but the house still feels wrong, the issue is probably not the thermostat:
- Dirty furnace filter. A clogged filter restricts airflow, so rooms don’t warm evenly and the system struggles to hit the setpoint. It’s the number one cause of uneven heating. Replace it, as in our furnace issue.
- Closed or blocked vents. Check that registers are open and not covered by furniture or rugs. Closing vents in unused rooms can cause pressure problems, so don’t shut too many.
- Air leaks and drafts. Cold air coming in around windows and doors makes certain rooms feel colder than the number says. See our drafty windows issue.
- Short cycling. If the furnace turns on and off every few minutes, causes include a dirty filter, a thermostat in a bad location, or an oversized furnace. If a new filter and fixing the location don’t help, call an HVAC technician.
- Humidity. Dry winter air feels colder than humid air at the same temperature. A humidifier, set to about 30 to 40 percent indoors, can make 68 degrees feel more comfortable.
Step 7: Check the settings (smart and programmable thermostats)
A lot of “my thermostat is wrong” turns out to be a settings issue:
- A schedule or “hold” mode may be overriding what you set. Check whether the display says “Hold,” “Away,” or “Eco.”
- Wrong mode: make sure it’s on “Heat” (or “Auto”) and not “Cool” or “Off.”
- Fan setting: “On” runs the fan continuously and can make the house feel drafty, while “Auto” runs it only when heating.
- Smart thermostats (Nest, Ecobee, and similar) may be using remote sensors, or learning features that adjust temperatures. Check the app.
- Wi-Fi or firmware issues: a restart or a software update often fixes odd smart thermostat behavior.
When it really is the thermostat
Replace it if:
- It’s off by several degrees and can’t be recalibrated
- The display is dead or flickering after you’ve replaced the batteries
- It’s unresponsive, or the system doesn’t turn on or off when it should
- It’s an old, unreliable model
A basic programmable thermostat costs around $25 to $50, and a smart one runs roughly $100 to $250. Many utilities offer rebates on smart models, so check before you buy.
A note on DIY replacement: swapping a thermostat is a reasonable weekend job if you’re careful: turn off power at the breaker, photograph the wire labels before disconnecting, and match them to the new unit. Pay attention to the type of system you have. Some thermostats are not compatible with certain systems, and many smart models need a “C-wire” (common wire) for power. If you’re not sure, a pro can do this in under an hour.
Before you go
Try fresh batteries, a second thermometer, and a clean filter before you spend $200 on a new thermostat. Odds are decent that one of those solves it.
Next up: frozen pipes. How to prevent them before the first hard freeze, and what to do the moment you find one.
Talk soon, Homeowner Help